Web Registration Guide
Registration Dates
- New Online Registration Instructions
Step 1:
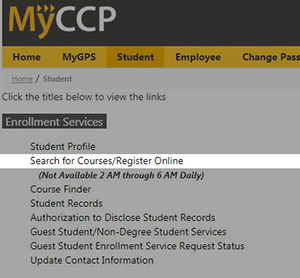
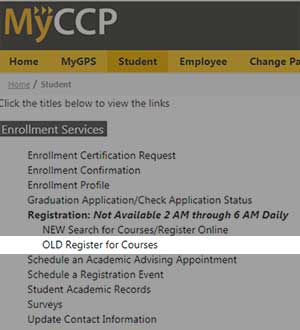
Login to your MyCCP account, select Search for Courses/Register Online.
Step 2:
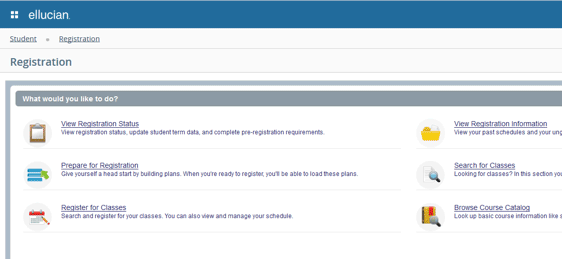
Click on the Register for Classes, link.
Step 3:
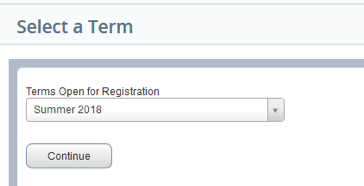
Select a term from the dropdown box.
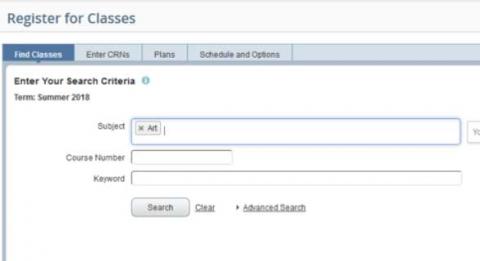
Step 4:
Search for a class using the subject name, CRN or keyword.
Step 5:
Find the course you want and click the Add button to add a class.
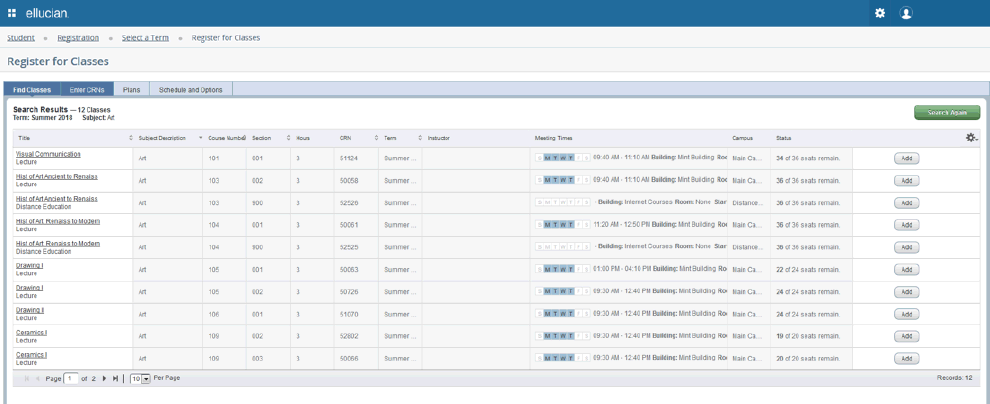
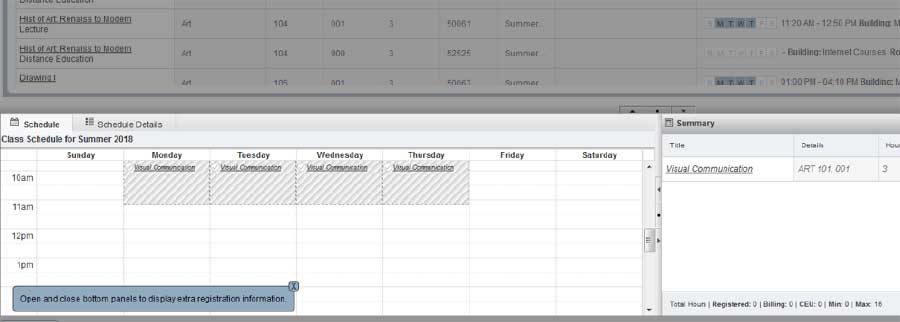
Note: Added classes will show on the Schedule Calendar and Summary
Step 6:
Click on the Submit button to complete the registration.
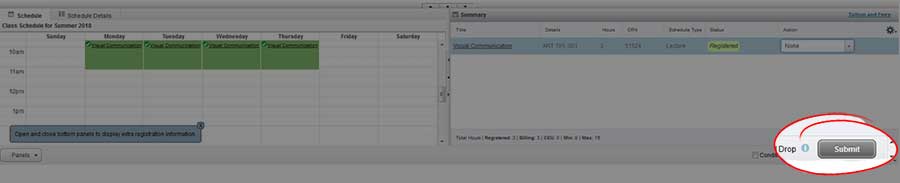
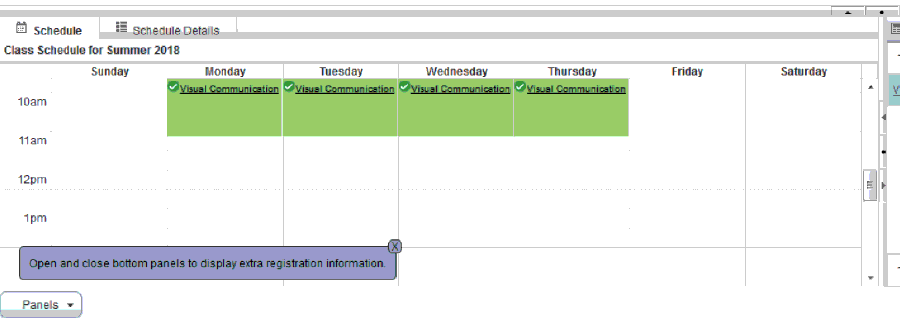
Successfully registered classes will be shown in green on the calendar and summary.
To use the Web Registration system effectively, you should use one of the following College-supported browsers:
- Windows: Firefox Mozilla 19.0 or higher and Internet Explorer 8.x or higher
- Mac OS 10.3 or higher: Firefox Mozilla 19.0 and higher or Safari
- Classic Instructions
To use the Web Registration system effectively, you should use one of the following College-supported browsers:
- Windows: Firefox Mozilla 19.0 or higher and Internet Explorer 8.x or higher
- Mac OS 10.3 or higher: Firefox Mozilla 19.0 and higher or Safari
Search for Courses Using Course Finder
Step 1:
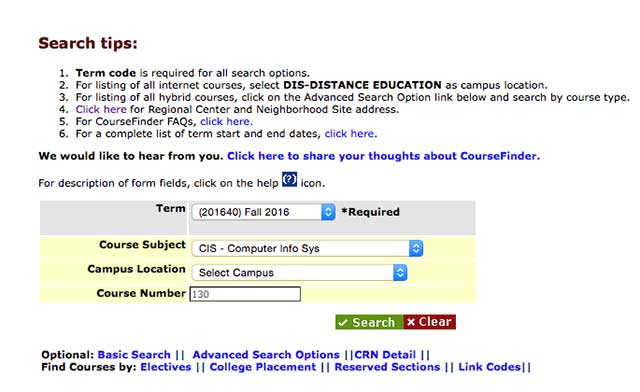
Use Course Finder to search for available courses.
Step 2:
Following the prompts, search for the course(s) that you need. If you’re not sure which courses you need, you may want to meet with an academic advisor for help.
Step 3:
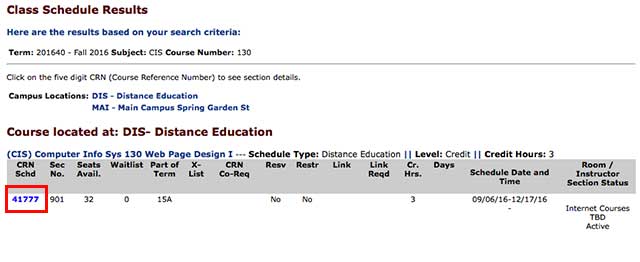
The Class Schedule Results page will display all the sections for the selected subject and/or course number.
Step 4:
Find the course section that has available seats. Make sure to write the Course Reference Number (CRN) down. Do this for each course you need.
Step 5:
Once you have written down your CRNs, you are ready to register for the courses you selected.
Register for Courses
Step 1:
Login to your MyCCP account, select OLD Register for Courses.
Step 2:
Enter the registration term that you want to register (fall, winter, spring or summer).
Step 3:
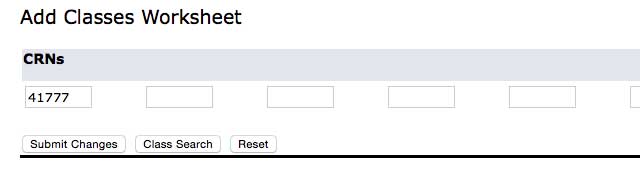
To add courses, select Add Classes Worksheet and enter the CRNs that you wrote down using Course Finder. Once all your CRNs are entered, select Submit Changes.
Step 4:
If you have successfully registered, the course status will show Registered for each course you have selected under the Current Schedule tab.
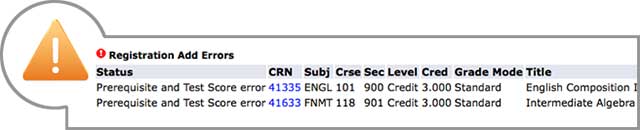
** Error Messages can occur for a number of reasons, including not having the necessary prerequisites, holds on accounts and incomplete student data. If you receive an error message when registering, print the screen or write down the message and then contact the College via email at **
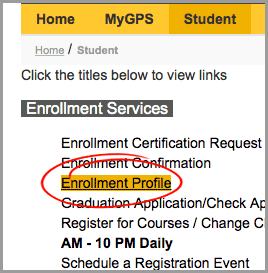
To print a copy of your registered courses, select Enrollment Profile.